Follow the steps below to start creating awesome double-exposure photos in just a few seconds using Procreate! The steps to get this cool effect are super simple, but it truly is a game changing design trick.
Video tutorial available on YouTube 👉 https://youtube.com/shorts/Z-VWxZ3fLpA
Quick browse:
Step 1: Prepare your base photo
Start with a photo of a person, animal or object.
Remove the background, either by erasing everything manually, or by picking the selection tool, setting it to automatic, dragging your pencil on the screen to select the background, and using clear from the layer menu.


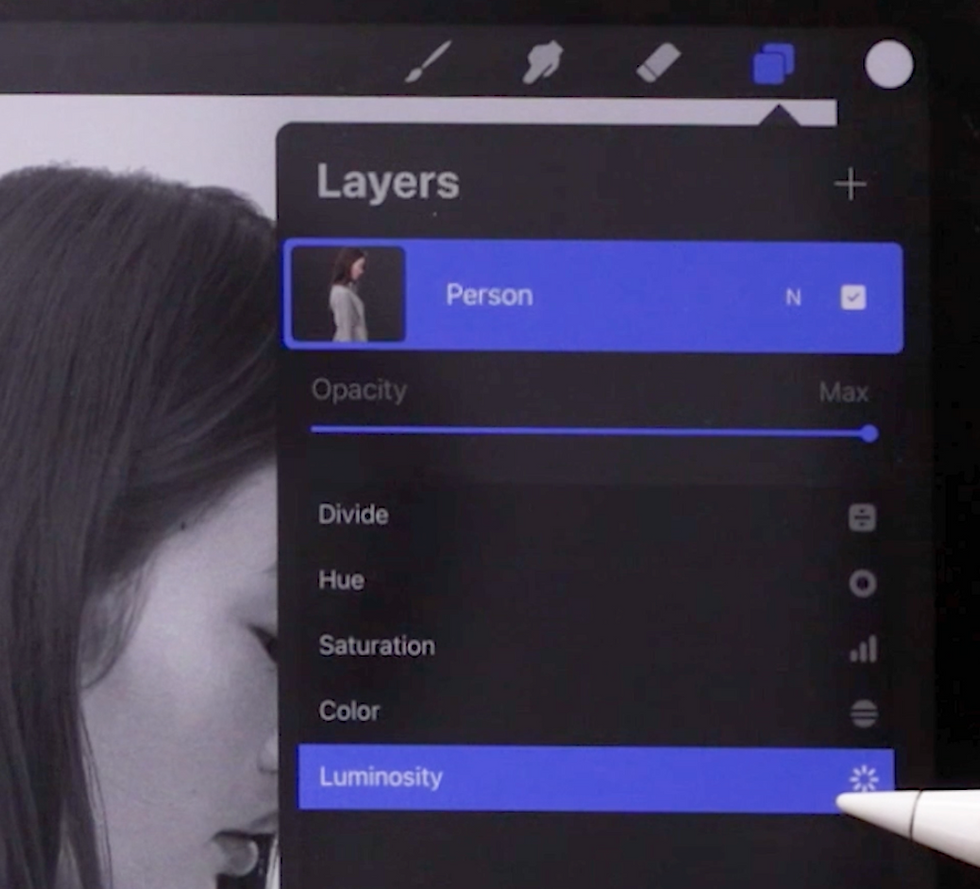
3. Tap on the little N next to the layer's visibility checkmark and change the blending mode of the layer to Luminosity (bottom of the list).

Step 2: Set up your secondary photo
Add your secondary picture to your file
Change its blending mode to Lighten.

Step 3: Add a layer mask
Hold two fingers on your person layer to select the shape
Turn your selection into a mask by tapping twice on your secondary picture layer and selecting Mask.
Pro Tip: Polish up your piece by erasing your secondary picture with a soft brush when it overlaps with key elements such as facial features.

✏️ Step up your illustration & design game ✏️
The kit includes brushes, templates, cheat sheets, textures, and a special discount code.


Comments